Animate Lab Exercise #7: Working with the Timeline
Prerequisites:
1. Create
a folder on your desktop called Exercise7.
2. Detach and unzip the chapter7 Animate file.
Place the Flash file inside your chapter7 folder.
Requirements:
A. Add Layers
1. Open the Animate Flash
file- chapter7_HTML5 Canvas.fla.
From the Main Menu, select File->
Open. Look for the chapter7.fla in your
chapter7 folder
2. Open the Library Panel.
a. From the File Menu, select Windows-> Library
![]()
b. Move and dock the Library Panel beside the Properties tab
Note:
All the image objects will show up in the Library Panel
3. In the Library panel, select and drag
the safari-background symbol onto the stage.
Note: This will create a keyframe
for first layer which will have the background.
a. Name the layer as “background”
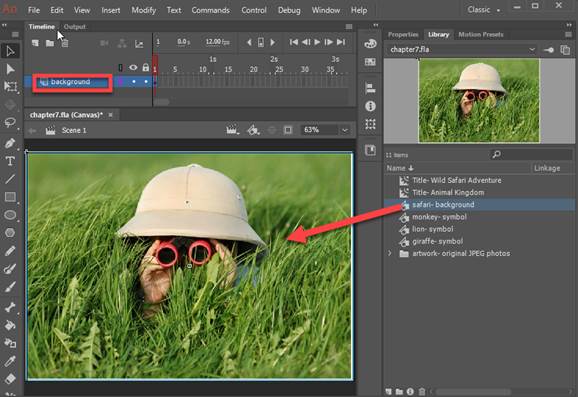
b. Set the position of the
image to X= 0.0 and Y= 0.0. Select the
image and in the Properties tab change the coordinates.

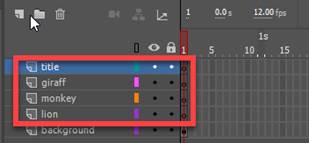
4. Create 5 layers for the
other objects you will need in the timeline.
Name the layers as follows.
a. The 2nd layer will be the lion layer.
b. The 3rd layer will be the monkey layer.
c. The 4th layer will be the giraffe layer.
d. The 5th layer will be the title layer.
5. Select and drag from the Library panel, the object symbol to
its appropriate layer.
a. In frame 1 of the lion
layer, copy and drag an instance of the lion-symbol from the Library panel.

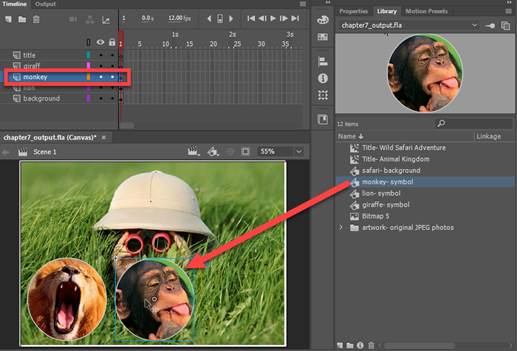
b. In frame 1 of the monkey layer,
copy and drag an instance of the monkey symbol from the Library panel.
c.
In frame 1 of the giraffe layer, copy and drag an instance of the
giraffe symbol from the Library panel

d:
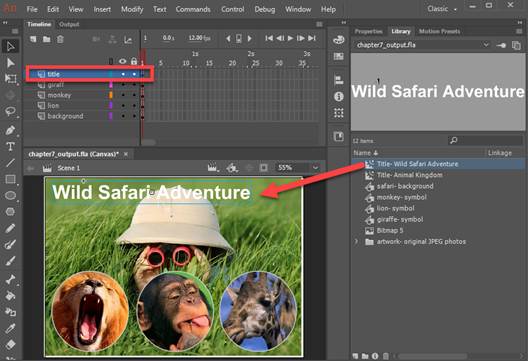
In frame 1 of the title layer, copy and drag an instance of the
“Title- wild safari adventure” symbol from the Library panel to the Stage
B. Working
with the Timeline:
1.
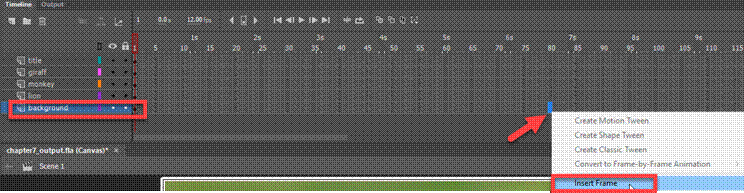
In the background layer, Insert regular frames from frame 2 to frame 80.
Right click on frame 80 and select Insert
Frame
2. In the title layer,
insert a keyframe in frame 41.
Right click on frame 41 and select Insert
Blank Keyframe

3.
In title layer of frame 41, copy and drag the copy and drag an instance
of the “Title- Animal Kingdom” symbol from the Library panel to the Stage

4. In
the title layer, create regular frames from frame 41 to frame 80. Right click on frame 80, and select Insert
Frame

5. In
the lion layer, move the keyframe from frame 1 to frame 20.
a.
Select frame 1, hold down the left click button and then drag keyframe
to frame 20.
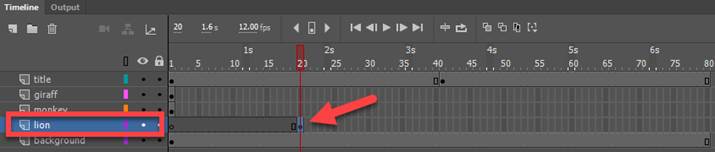
b. In the lion layer, create
regular frames from frame 21 to frame 80.
Right click on frame 80 and select Insert Frame
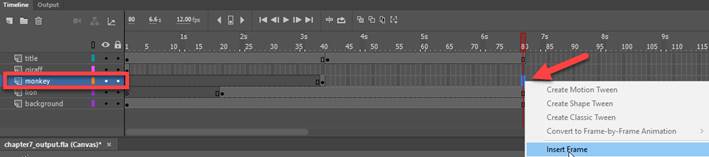
6. In the monkey layer, move the keyframe from
frame 1 to frame 40.
a. Select frame 1, hold down the
left click button and then drag keyframe to frame 40.

b. In the monkey layer, create
regular frames from frame 40 to frame 80.
Right click on frame 80 and select Insert Frame
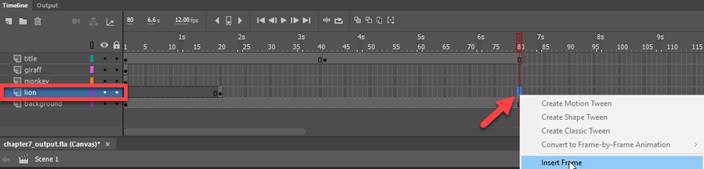
7.
In the giraffe layer, move the keyframe from frame 1 to frame 60.
a. Select frame 1, hold down the left
click button and then drag keyframe to frame 60.

b.
In the giraffe layer, create regular frames from frame 60 to frame
80. Right click on frame 80 and select Insert Frame

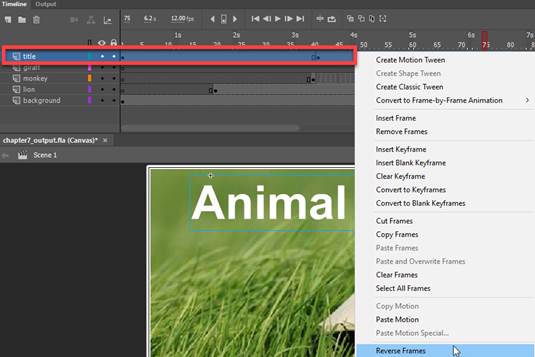
8. Reverse frames for the
title layer
Click on the title layer. Right click and select Reverse Frames
9. Preview frames in the
Timeline.
a. Place the red marker at frame 1
by dragging to the beginning of the timeline.
b. Click on the play button

C. Save, Publish and Test
Movie
1. Verify
your document has the required objects and symbols on the timeline and
stage.
See attached sample of the Flash
output file- Chapter7_output.html.
2.
Save your Animate Chapter7.fla file in your chapter7 folder.
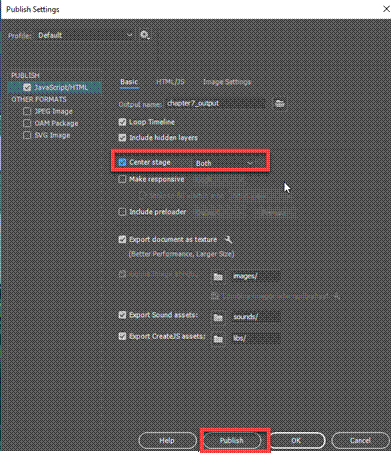
3. Publish your file in JavaScript/HTML format.
From the Main
Menu, select Publish Settings.
Select “Center Stage = Both” only
Click on the Publish button
4. Test Movie. Press <Ctrl><Enter> or from the
Main Menu, select, Control -> Test
SUBMIT:
1. Submit the screenshot of the output result
when you test the Movie in step #C4 above.
On your keyboard, press <Print
Screen> and then paste into a Paint document. Save the file as a JPG
2. Zip up your Exercise-7 folder containing the
Animate Files
NOTE: Right click on the folder and select Send to
“Compress Folder”. The file will have a
file extension of .zip.
3. Submit
and upload the screenshots and zipped up compress Exercise-7 folder to the
Canvas Animate Exercise 7 drop box.