Dreamweaver
Lab Lesson
9
In this lesson, you
will be creating all the pages for the Joe’s Tiny Diner site using the Liquid
design- two column page layout you created in Lesson 8.
You will also be creating
a vertical navigation menu using the unordered list.
1. Create the vertical
navigation menu using the unordered list tag.
2. Use the CSS Box Model technique in adding margins and padding to the DIV tag
layers and content elements.
3. Insert the image and
text elements into the DIV layers.
4. Add and apply the
layout and format style rules for the DIV tags and content elements.
5. Test the web site by
verifying the links are working in the navigation menu.
Desired Output:
Attached is the desired output for Lesson9Output
sample pages.
Below is the wireframe:

Below is the site map:

Prerequisites:
1.
Download
AssignmentLesson9.zip on your desktop
2. Unzip the
folder on your desktop and rename the site folder to Lesson9
NOTE:
In your Lesson 9 site folder, verify you have the following files and
folder:
a.
layout2.html
b.
mystyle2.css
c.
images folder
3. Setup the manage site for Lesson 9. Name to site as “Joe’s Tiny Diner”.

4. Ensure the Properties panel is
open. Go to Windows-> Properties or
press <Ctrl><F3>. You can
dock the panel at the bottom of the screen.

A. Open layout2.html from the Files Panel
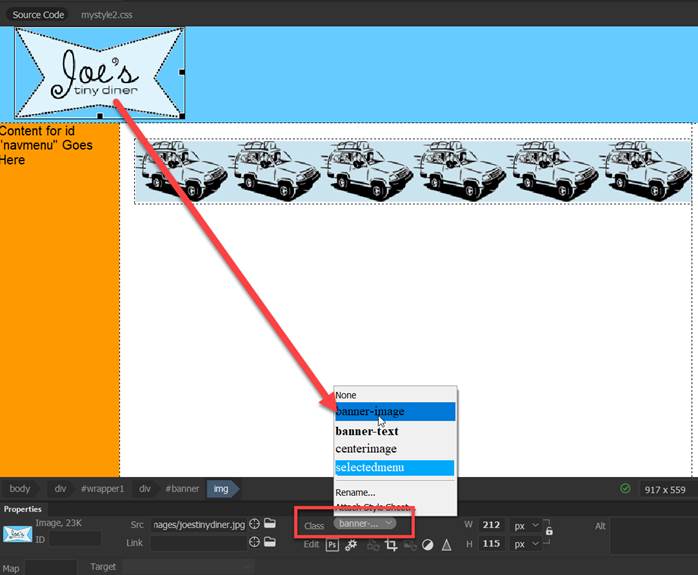
B. Insert the banner image
and text in the banner DIV layer.
1. Delete the text placeholder in the banner DIV
layer and verify the cursor is blinking in the layer.
2. Insert the joetinydiner.jpg in the banner DIV layer and add an alternative text for the inserted
image.

3. Apply the class style .banner-image rule to the image file.
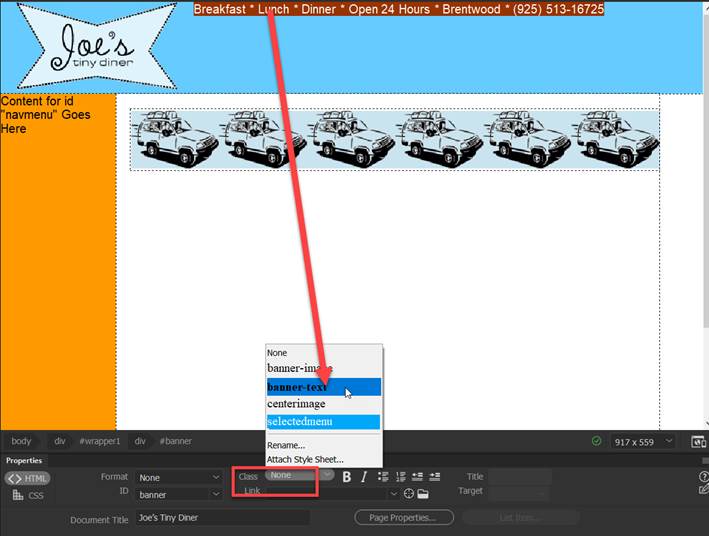
4. Copy and paste the text below right side of
the image:
Breakfast * Lunch *
Dinner * Open 24 Hours * Brentwood * (925) 513-16725
Note: To
paste, use the Edit- Paste Special- Text Only function
5. Highlight the text and apply the class style rule .banner-text to
the text element.
6. Verify the banner DIV layer matches the
output below:

C. Setup the vertical
navigation menu using an unordered list tag in the navmenu DIV layer.
NOTE: Before proceeding, delete any text placeholder
inside the navmenu DIV tag layer.
Verify that the
cursor is blinking inside the navmenu DIV tag layer.

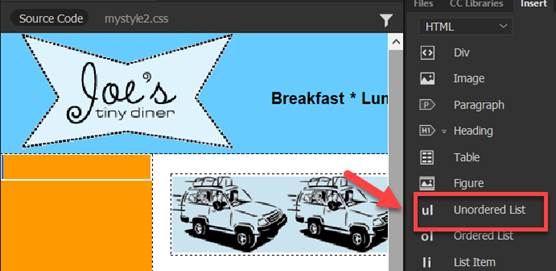
1.
Insert an unordered list <ul>
tag in the navmenu AP layer.
a. Click inside the navmenu layer.
b. Verify the cursor is blinking
inside the navmenu layer.
c. Go to the Insert panel and select
the Text tab from the pull down.
d. Select and click the ul - Unordered list to insert the <ul> tag inside the navmenu DIV layer.
2. Type the following text inside
the navmenu layer
Note:
Press <enter> to add each item list.
Home
index.html
Breakfast breakfast.html
Lunch lunch.html
Dinner dinner.html
Location location.html
Contact contact.html
About Us aboutus.html
Insert the hyperlinks in the Properties
inspector.

3. Verify the links you have entered are
typed in correctly before proceeding.
Note: Links in your navmenu
will not work if the file name is entered incorrectly.

D. Insert
the text content in
the footer DIV layer.
NOTE: Before proceeding, delete any text
placeholder inside the footer DIV tag layer.
Verify that the
cursor is blinking inside the footer DIV tag layer.
![]()
1. Copy and paste the
following text in the footer layer.
Note: Use Paste Special- Text Only. Use a line break to have the phone and email
address to display on separate line.
Copyright © 2013 Joe's Tiny Diner | Site Map |
Privacy Policy | email: enter your email address
101 A Sand Creek Road, Brentwood CA 94513 (925)
513-1625
2. Add the text hyperlink for the following
links:
a. Site Map:
sitemap.html
b. Privacy Policy: policy.html
![]()
E. Save
the layout2.html and external style sheet.
1. Go to the File Menu and select “Save All”.
2. Close the layout2.html page.
Note: You will be using this
layout page to create all the pages for the Joe’s Tiny Diner site.

F. Create the index.html page.
1. Open
the layout2.html page from the File Panel.
2. Save a copy of the page as index.html and close the layout2.html.
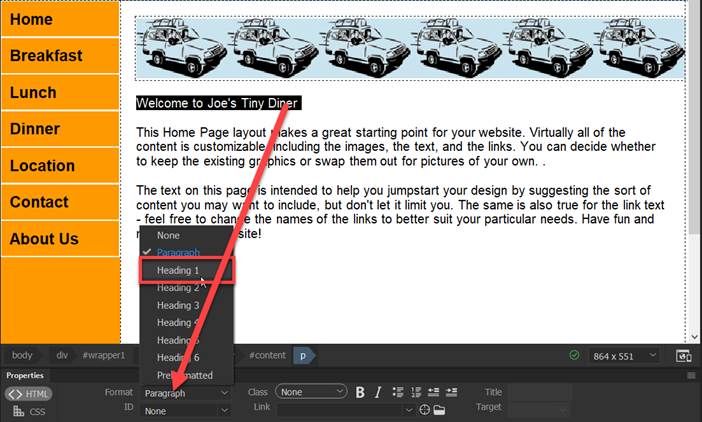
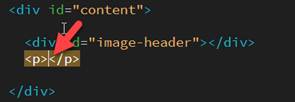
3. Click underneath the image header and verify the cursor is blinking.
NOTE: If you look in the code window,
your cursor should be inside the second paragraph tag <p></p>

4.
Copy and paste the text heading and placeholder below.
Welcome to Joe's Tiny Diner
This Home Page layout makes a great starting point for your website.
Virtually all of the content is customizable,
including the images, the text, and the links. You can decide whether to keep
the existing graphics or swap them out for pictures of your own. .
The text on this page is intended to help you jumpstart your design by
suggesting the sort of content you may want to include, but don't let it limit
you. The same is also true for the link text - feel free to change the names of
the links to better suit your particular needs. Have
fun and make a great website!
Note: To paste,
use the Edit- Paste Special- Text Only function
5. For the text header and text
placeholder, create paragraph tags by pressing <enter>

6. Apply the <h1> tag rule
to the text heading. Highlight the text
and select Heading 1 from the Format field in the Properties panel.
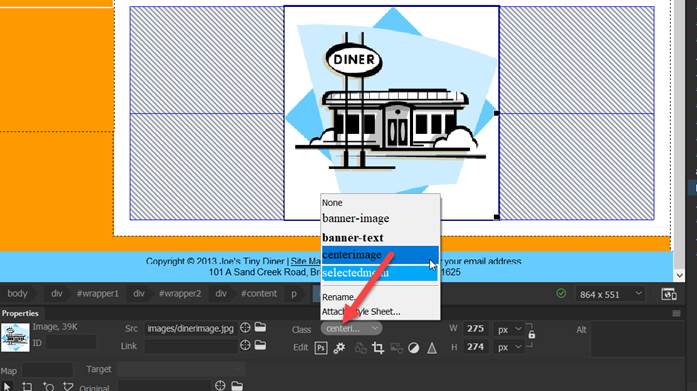
7. Insert the jpeg image file- dinerimage.jpg.
a. Create a paragraph tag after the end of the last paragraph by pressing
<enter>
b. Insert the dinerimage.jpg.
c. Select the image. From the Properties Panel, select the class
rule centerimage from the pull down menu
8.
Highlight Home. Apply the class rule selected- to index link in the navigation menu

9. Save the page and style sheet. Go to the File Menu and select “Save All”.
10. Close the page after verifying the
index.html page matches the ouput below.

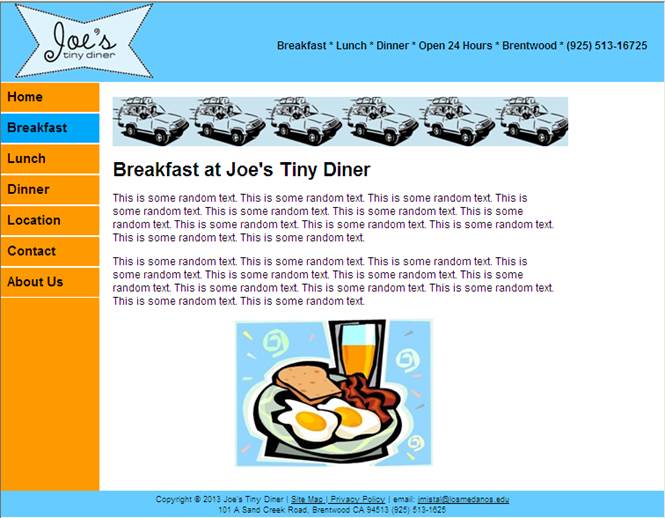
G. Create the breakfast.html page.
1. Open
the layout2.html page from the File Panel.
2. Save a copy of the page as breakfast.html
and close the layout2.html
3. Click underneath the image header and verify the cursor is blinking.
NOTE: If you look in
the code window, your cursor should be inside the second paragraph tag
<p></p>

4.
Copy and paste the text heading and text placeholder below:
Breakfast at Joe's Tiny Diner
Lorem ipsum dolor sit amet, consetetur sadipscing elitr, sed diam nonumy eirmod
tempor invidunt ut labore et dolore magna aliquyam erat, sed diam voluptua. At
vero eos et accusam et justo duo dolores et ea rebum. Stet clita kasd
gubergren, no sea takimata sanctus est Lorem ipsum dolor sit amet.
At vero eos et accusam et justo duo dolores et ea rebum. Stet clita kasd
gubergren, no sea takimata sanctus est Lorem ipsum dolor sit amet. Lorem ipsum
dolor sit amet, consetetur sadipscing elitr, sed diam nonumy eirmod tempor
invidunt ut labore et dolore magna aliquyam erat, sed diam voluptua.
Note: To
paste, use the Edit- Paste Special- Text Only function
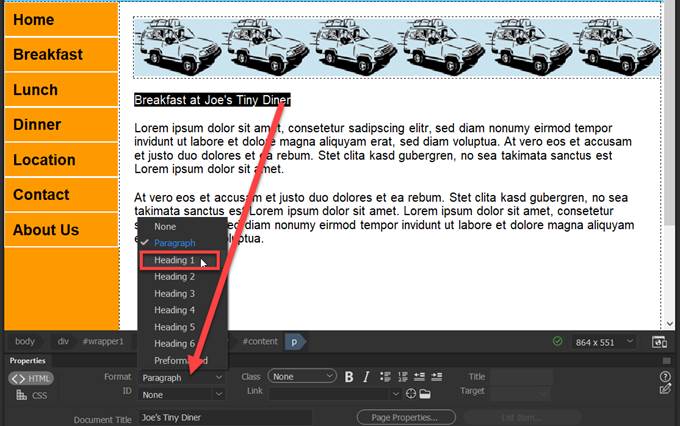
5. For the text header and text
placeholder, create paragraph tags by pressing <enter>
6. Apply the <h1> tag rule
to the text heading. Highlight the text
and from the Properties panel select Heading 1 in Format field.
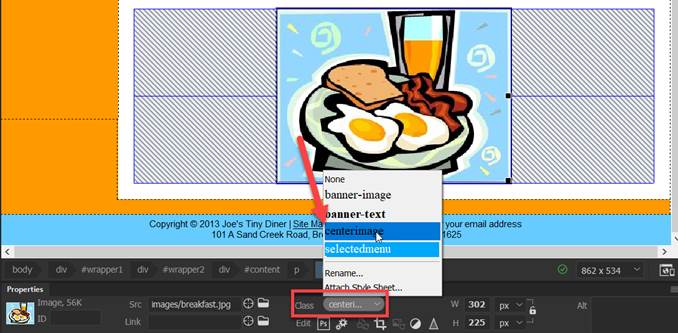
7. Insert the jpeg image file- breakfast.jpg.
a. Create a paragraph tag after the end of the
last paragraph by pressing <enter>
b. Insert the breakfast.jpg.
c. Select the image. From the Properties Panel, select the class
rule centerimage from the
pulldown menu
8. Apply the class rule selectedmenu to the breakfast link
in the navigation menu from the Properties Panel

9. Save the page and style sheet. Go to the File Menu and select “Save All”.
10. Close the page after verifying the breakfast.html
page matches the output below.
H. Create the lunch.html page.
1. Open
the layout2.html page from the File Panel.
2. Save a copy of the page as lunch.html and close the layout2.html.
3. Click underneath the image header and verify the cursor is blinking
NOTE: If you look in the code window,
your cursor should be inside the second paragraph tag <p></p>

4.
Copy and paste the text heading and text placeholder below:
Lunch at Joe's Tiny Diner
Lorem ipsum dolor sit amet, consetetur sadipscing elitr, sed diam nonumy
eirmod tempor invidunt ut labore et dolore magna aliquyam erat, sed diam
voluptua. At vero eos et accusam et justo duo dolores et ea rebum. Stet clita
kasd gubergren, no sea takimata sanctus est Lorem ipsum dolor sit amet.
At vero eos et accusam et justo duo dolores et ea rebum. Stet clita kasd
gubergren, no sea takimata sanctus est Lorem ipsum dolor sit amet. Lorem ipsum
dolor sit amet, consetetur sadipscing elitr, sed diam nonumy eirmod tempor
invidunt ut labore et dolore magna aliquyam erat, sed diam voluptua.
.
Note: To
paste, use the Edit- Paste Special- Text Only function
5. For the text header and text
placeholder, create paragraphs by press <enter>
6. Apply the <h1> tag rule
to the text heading. Highlight the text
and from the Properties panel select Heading 1 in Format field.
7. Insert the jpeg image file- lunch.jpg.
a. Create a paragraph tag after the end of the
last paragraph by pressing <enter>
b. Insert the lunch.jpg.
c. Select the image. From the Properties Panel, select the class
rule centerimage from the
pulldown menu

8. Apply the class rule selectedmenu to the lunch link in the
navigation menu from Properties Panel
9. Save the page and style sheet. Go to the File Menu and select “Save All”.
10. Close the page after verifying the lunch.html
page matches the output below.

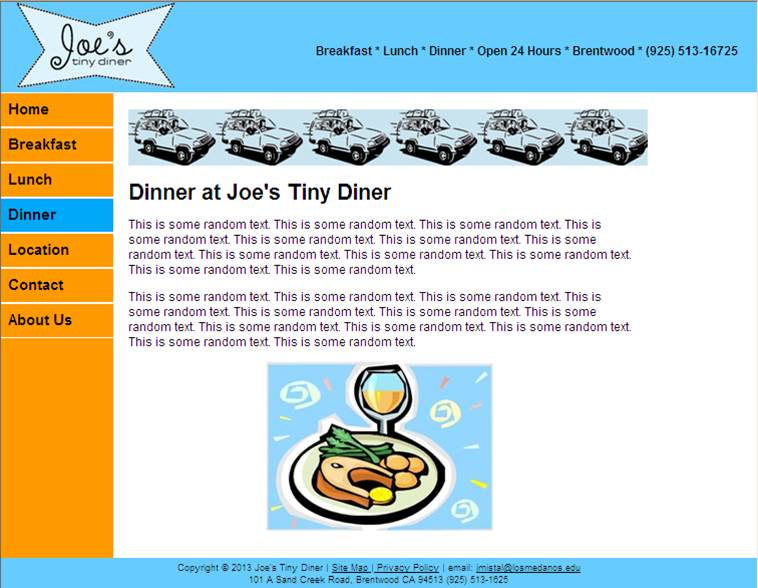
I. Create the dinner.html page.
1. Open the layout2.html page from the File Panel.
2. Save a copy of the page as dinner.html and close the layout2.html.
3. Click underneath the image header and verify the cursor is blinking.
NOTE: If you look in the code window, your
cursor should be inside the second paragraph tag <p></p>

4.
Copy and paste the text heading and text placeholder below:
Dinner at Joe's Tiny Diner
Lorem ipsum dolor sit amet, consetetur sadipscing elitr, sed diam nonumy
eirmod tempor invidunt ut labore et dolore magna aliquyam erat, sed diam
voluptua. At vero eos et accusam et justo duo dolores et ea rebum. Stet clita
kasd gubergren, no sea takimata sanctus est Lorem ipsum dolor sit amet.
At vero eos et accusam et justo duo dolores et ea rebum. Stet clita kasd
gubergren, no sea takimata sanctus est Lorem ipsum dolor sit amet. Lorem ipsum
dolor sit amet, consetetur sadipscing elitr, sed diam nonumy eirmod tempor
invidunt ut labore et dolore magna aliquyam erat, sed diam voluptua.
.
Note: To
paste, use the Edit- Paste Special- Text Only function
5. For the text header and text
placeholder, create paragraph tags by pressing <enter>
6. Apply the <h1> tag rule
to the text heading. Highlight the text
and from the Properties panel select Heading 1 in Format field.
7. Insert the jpeg image file- dinner.jpg.
a. Create a paragraph tag after the end of the last
paragraph by pressing <enter>
b. Insert the dinner.jpg.
c. Select the image. From the Properties Panel, select the class
rule centerimage from the
pulldown menu
8. Apply the class rule selectedmenu to the dinner link in the
navigation menu

9. Save the page and style sheet. Go to the File Menu and select “Save All”.
10. Close the page after verifying the dinner.html
page matches the output below.
J. Create the location.html page.
1. Open the layou2.html page.
2. Save a copy of the page as location.html
and close the layout2.html.
3. Click underneath the image header and verify the cursor is blinking.
NOTE: If you look in the code window,
your cursor should be inside the second paragraph tag <p></p>

4.
Copy and paste the text heading and text placeholder below:
Location of Joe's Tiny Diner
Lorem ipsum dolor sit amet, consetetur sadipscing elitr, sed diam nonumy
eirmod tempor invidunt ut labore et dolore magna aliquyam erat, sed diam voluptua.
At vero eos et accusam et justo duo dolores et ea rebum. Stet clita kasd
gubergren, no sea takimata sanctus est Lorem ipsum dolor sit amet.
At vero eos et accusam et justo duo dolores et ea rebum. Stet clita kasd
gubergren, no sea takimata sanctus est Lorem ipsum dolor sit amet. Lorem ipsum
dolor sit amet, consetetur sadipscing elitr, sed diam nonumy eirmod tempor
invidunt ut labore et dolore magna aliquyam erat, sed diam voluptua.
.
Note: To
paste, use the Edit- Paste Special- Text Only function
5. For the text header and text
placeholder, create paragraph tags by pressing <enter>
6. Apply the <h1> tag rule
to the text heading. Highlight the text
and from the Properties panel select Heading 1 in Format field.

7. Create the “googlemap” DIV tag layer and
insert the IFRAME.
a. Verify the cursor is
blinking underneath the paragraph.
b. Insert
a DIV tag.
c. For the Insert, select
“At insertion point”.
d. Select “googlemap” as the ID and then click OK button

e. Click inside the
“googlemap” DIV layer in Design View.
Remove the
text placeholder.
Note: Verify that the cursor pointer is inside the
DIV layer.

f. Go to the Code View. Verify that the cursor is
blinking in between the <div> tag below
![]()
g. Insert the following IFRAME code between the
opening and closing googlemap DIV tag.
Copy and paste the
iframe tag and attributes within the googlemap DIV tag in the Code View
Note: To paste, use the Edit-
Paste Special- Text Only function.
|
<iframe width="450"
height="290" frameborder="0" scrolling="no"
marginheight="0" marginwidth="0" src="http://maps.google.com/maps?f=q&source=embed&hl=en&geocode=&q=101+A+Sand+Creek+Road,+Brentwood+CA+94513&aq=&sll=38.203655,-107.402344&sspn=48.794662,55.458984&ie=UTF8&hq=&hnear=101+Sand+Creek+Rd,+Brentwood,+California+94513&t=m&ll=37.942235,-121.703796&spn=0.01963,0.038624&z=14&iwloc=A&output=embed"></iframe><br
/><small><a
href="http://maps.google.com/maps?f=q&source=embed&hl=en&geocode=&q=101+A+Sand+Creek+Road,+Brentwood+CA+94513&aq=&sll=38.203655,-107.402344&sspn=48.794662,55.458984&ie=UTF8&hq=&hnear=101+Sand+Creek+Rd,+Brentwood,+California+94513&t=m&ll=37.942235,-121.703796&spn=0.01963,0.038624&z=14&iwloc=A"
target="_blank">View Larger Map</a></small> |
Below is the how the code
will look like after pasting the iframe code in the <div id=”googlemap”> tag

h.
Go to the Design View.
8. Apply the class rule selectedmenu to the location link
in the navigation menu
9. Save the page and style
sheet. Go to the File Menu and select
“Save All”.
10.
Close the page after verifying the location.html page matches the ouput
below

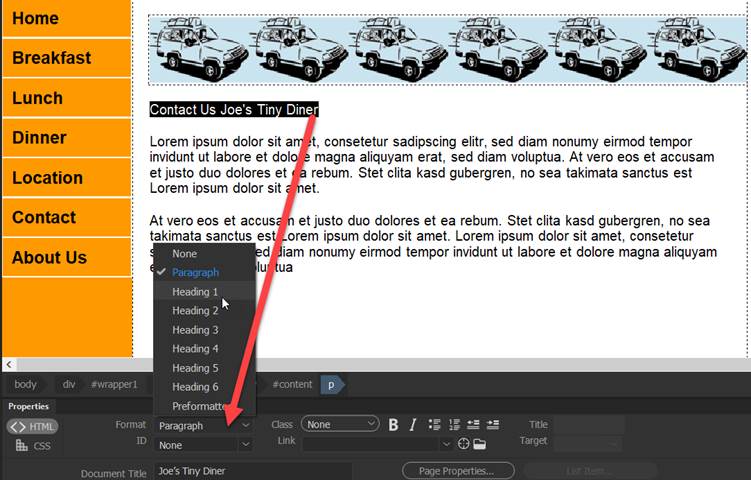
K. Create the contact.html page.
1. Open the layout2.html page from the File Panel.
2. Save a copy of the page as contact.html and close the layout2.html.
3. Click underneath the image header and verify the cursor is blinking.
NOTE: If you look in the code window, your
cursor should be inside the second paragraph tag <p> </p>
4.
Copy and paste the text heading and text placeholder below:
Contact Us Joe's Tiny Diner
Lorem ipsum dolor sit amet, consetetur sadipscing elitr, sed diam nonumy
eirmod tempor invidunt ut labore et dolore magna aliquyam erat, sed diam
voluptua. At vero eos et accusam et justo duo dolores et ea rebum. Stet clita
kasd gubergren, no sea takimata sanctus est Lorem ipsum dolor sit amet.
At vero eos et accusam et justo duo dolores et ea rebum. Stet clita kasd
gubergren, no sea takimata sanctus est Lorem ipsum dolor sit amet. Lorem ipsum
dolor sit amet, consetetur sadipscing elitr, sed diam nonumy eirmod tempor
invidunt ut labore et dolore magna aliquyam erat, sed diam voluptua.
.
Note: To
paste, use the Edit- Paste Special- Text Only function
5. For the text header and text
placeholder, create paragraph tags by pressing <enter>
6. Apply the <h1> tag rule
to the text heading. Highlight the text
and from the Properties panel select Heading 1 in Format field.
7. Insert the jpeg image file- contact.jpg
a. Create a paragraph tag after the end of the
last paragraph by pressing <enter>
b. Insert the contact.jpg.
c. Select the image. From the Properties Panel, select the class
rule centerimage from the
pulldown menu

8. Apply the class rule selectedmenu to the contact link
in the navigation menu
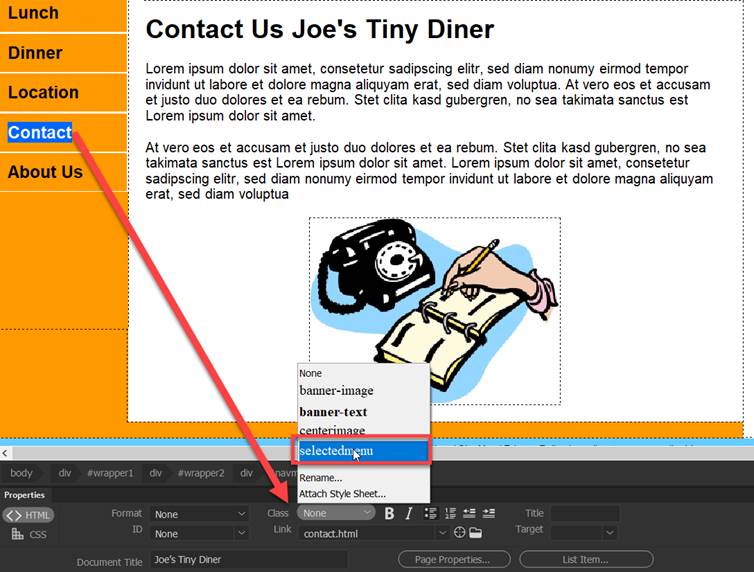
9. Save the page and style sheet. Go to the File Menu and select “Save All”.
10. Close the page after verifying the contact.html
page matches the output below.

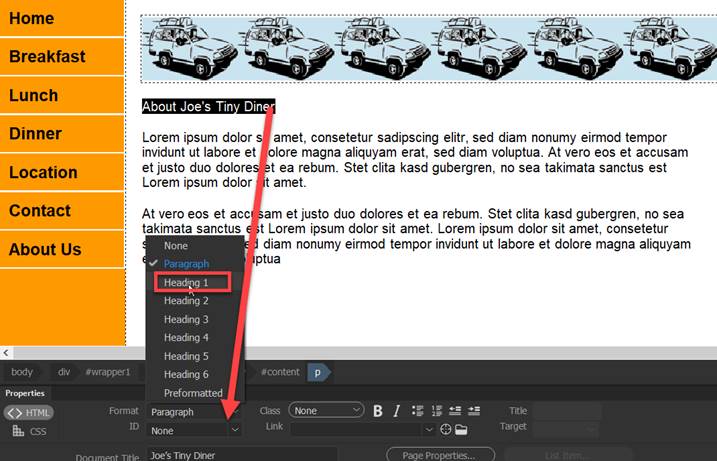
L. Create the aboutus.html page.
1. Open the layout2.html page from the
File Panel.
2. Save a copy of the page as aboutus.html and close the layout2.html.
3. Click underneath the image header and verify the cursor is blinking.
NOTE: If you look in the code window, your
cursor should be inside the second paragraph tag <p> </p>

4.
Copy and paste the text heading and text placeholder below:
About Joe's Tiny Diner
Lorem ipsum dolor sit amet, consetetur sadipscing elitr, sed diam nonumy
eirmod tempor invidunt ut labore et dolore magna aliquyam erat, sed diam
voluptua. At vero eos et accusam et justo duo dolores et ea rebum. Stet clita
kasd gubergren, no sea takimata sanctus est Lorem ipsum dolor sit amet.
At vero eos et accusam et justo duo dolores et ea rebum. Stet clita kasd
gubergren, no sea takimata sanctus est Lorem ipsum dolor sit amet. Lorem ipsum
dolor sit amet, consetetur sadipscing elitr, sed diam nonumy eirmod tempor
invidunt ut labore et dolore magna aliquyam erat, sed diam voluptua.
Note: To
paste, use the Edit- Paste Special- Text Only function
5. For the text header and text
placeholder, create paragraphs by press <enter>
6. Apply the <h1> tag rule
to the text heading. Highlight the text
and from the Properties panel select Heading 1 in Format field.
7. Insert the jpeg image file- chef.jpg.
a. Create a paragraph tag after the end of the
last paragraph by pressing <enter>
b. Insert the chef.jpg.
c. Select the image. From the Properties Panel, select the class
rule centerimage from the
pulldown menu
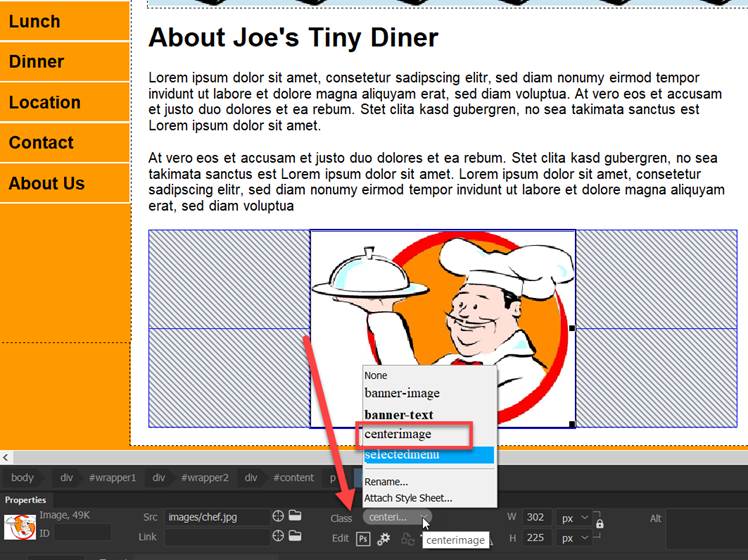
8.
Apply the class rule selectedmenu to the aboutus link in the navigation menu

9. Save the page and style sheet. Go to the File Menu and select “Save All”.
10. Close the page after verifying the
aboutus.html page matches the output below.

M. Save and Test.
1. Save all the HTML documents.
2. Open the index.html
3. Preview your web page by pressing F12 or
right click on index.html from the File Panel and selecting Open in Browser
4. Test
the web site by verifying if all the navigation menu links are working.
5. Verify your document is complete and that it closely matches the attached Lesson9Output.
Submit:
1. Zip up and
compress your Lesson9 folder.
2. Upload the compressed folder into the Canvaspage
for Dreamweaver Lab Lesson 9 drop box.
|
Lesson 9 Topics |
Points |
|
1. Insert nested DIV tag layers |
5 |
|
2. Create the vertical navigation menu |
10
|
|
3. Use the CSS Box Model technique |
10 |
|
4. Add and apply the layout & format style rules |
5 |
|
Total |
30 |