Dreamweaver
Lab Lesson 6: Part 1 and Part 2
In
this lesson, you will be setting up a one column and two column page layout
using DIV Tag for the LMC Brentwood
Cafe site using the Jello design technique.
1. Setup a manage site.
2.
Create a new HTML document.
3. Create an external cascading style sheet (CSS) and attach the file to the
HTML document.
4. Insert a DIV tag layer containers.
5.
Configure the layout and formatting style rules for the DIV tag layers.
6. Configure the background color, box dimensions (width & height) for the
DIV tag layers.
7.
Setup the page font and background color.
Desired Output:
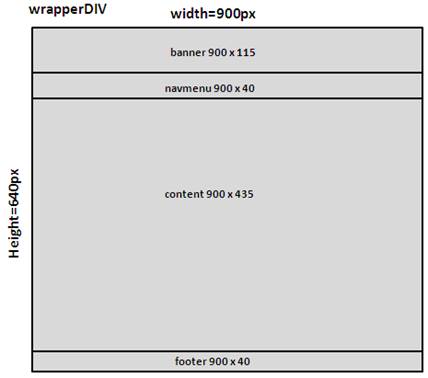
Part 1: You will be
creating a one column page
layout.
Attached is the desired
output for Lesson6Part1 sample page
Below is the wireframe
for Part 1:
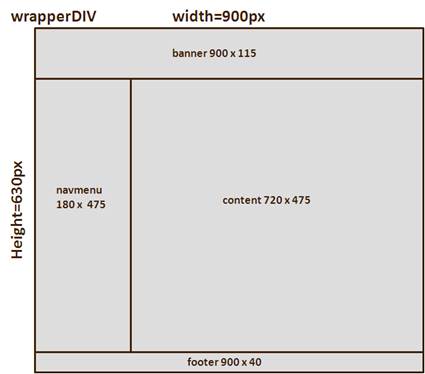
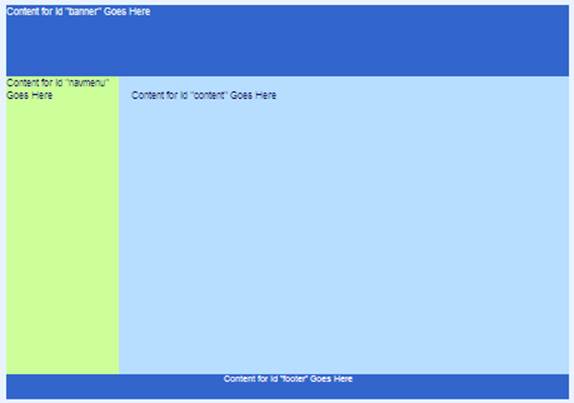
Part 2: You will be creating a two column page layout.
Attached is the desired output
for Lesson6Part2 sample page
Below is the wireframe
for Part 2:
Below are
the hexadecimals values for the DIV tag layer colors:
1. Wrapper: #B7DDFF
![]()
2. Banner Layer: #3366CC
![]()
3. Navigation Layer:
#CCFF99
![]()
4. Content Layer: #B7DDFF
![]()
5. Footer Layer: #3366CC
![]()
Prerequisites:
1. Create
a site folder on your desktop called Lesson6.
2. Create a subfolder called images.
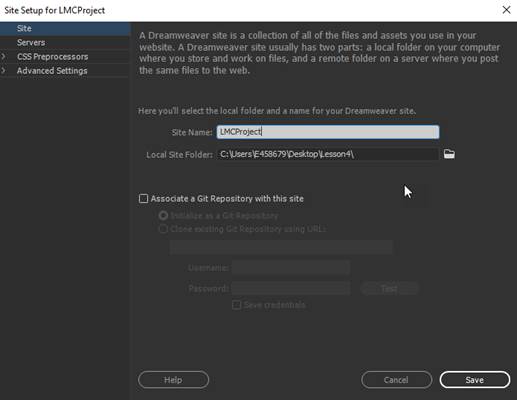
3. Setup the manage site.
a.
From the main menu, select Site-> New Site
b.
Enter the Site Name as LMC
Brentwood Cafe
c.
Select the Local Site Folder to your Lesson6 folder on your
desktop.
d.
Click Save
PART
1: One Column Page Layout using Jello Design (Centered Page) Technique
A. Create an external CSS
file.
1. Create an external Cascading Style Sheet (CSS) file.
2. Name the file as “mystyle1.css”.
3. Save the file in the CSS folder.
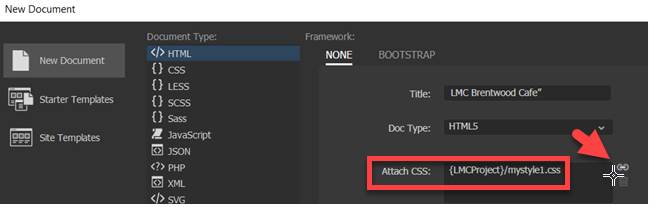
B. Create a new HTML
document.
1. Create a new HTML document.
2. Add the title “LMC Brentwood Cafe” to the html page.
3. Attach the mystyle1.css style sheet
to the layout1.html page
4. Name and save the file
as “layout1.html” page in the root
of your Lesson8 folder.
C. Configure the page font and background color.
1. Create a new CSS rule.
2. For the Selector Type,
choose Tag.
3. For the Selector Name,
enter the body.
4. Define the rule in the
external CSS file- mystyle1.css.
5. Select and verify the
following rules in the category:
font-family:
Lucida Grande
font-size: 16px
color: #3366CC (text color)
background-color: #E8F3FF
D. Create the wrapper DIV
tag layer which will be use to center the page.
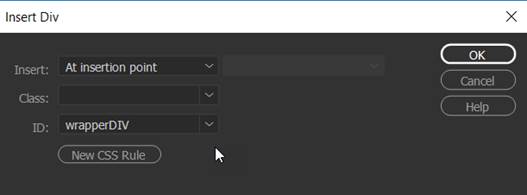
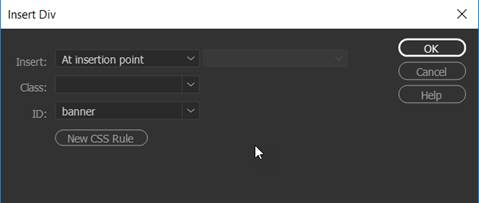
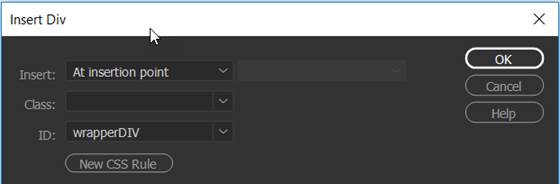
1. Insert a DIV tag. From
the Insert Panel, select DIV
2. For the Insert, select “At
insertion point”
3. Enter “wrapperDIV” as the ID.
4. Click on New CSS rule.
.
4. Define the rule in your external CSS file- mystyle1.css
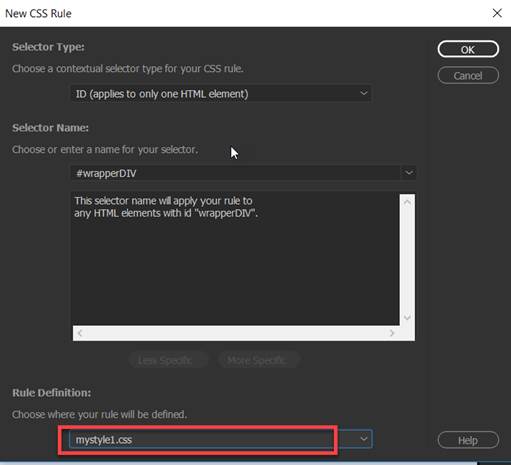
5. Enter the following rules in the CSS Definition dialog box:
background-color: #B7DDFF
width: 900px
height: 630px
margin-right:
auto
margin-left: auto
Note: If you click on Show
Set (red arrow), only the rules you selected will display in the Properties
window

6. Delete the
text placeholder in the DIV container you created before proceeding.
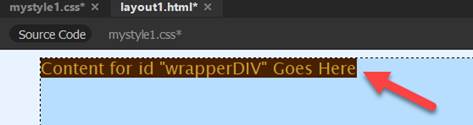
NOTE: Before proceeding, you
will need to delete the ext placeholder in the
wrapper DIV layer (see step D6).
E. Create the banner DIV
tag layer.
1. Insert a DIV tag. From
the Insert Panel, select DIV
2. For the Insert, select “At
insertion point”
3. Enter “banner” as the ID.
4. Click on New CSS rule.
5. Define the rule in your external CSS file- mystyle1.css
6. Enter the following rules in the CSS Definition dialog box:
color: #FFF
background-color: #3366CC
width: 900px
height: 115px
Note: If you click on Show Set check box
(red arrow), only the rules you selected will display in the Properties
window

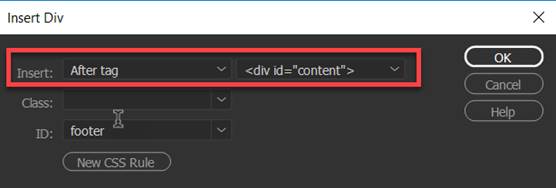
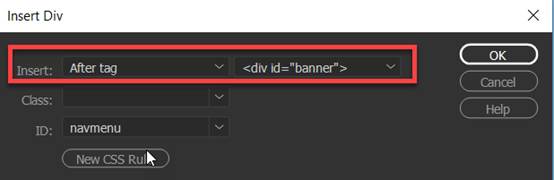
F. Create the navmenu DIV tag layer.
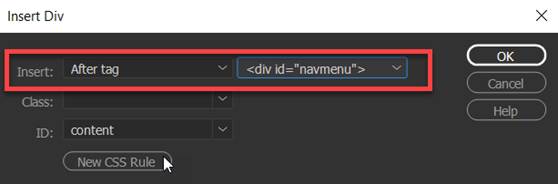
1. Insert a DIV tag. From
the Insert Panel, select DIV
2. For the Insert, select “After
tag” <div id=”banner”>.
3. Enter “navmenu”
as the ID.
4. Click on New CSS
rule.

5. Define the rule in your external CSS file- mystyle1.css.
6. Enter the following rules in the CSS Definition dialog box:
background-color:
#CCFF99
width: 900px
height: 40px
Note: If you click on Show Set check
box, only the rules you selected will display in the Properties window
G. Create the content DIV
tag layer.
1. Insert a DIV tag. From
the Insert Panel, select DIV
2. For the Insert, select “After
tag” “<div id=”navmenu”>.
3. Enter “content” as
the ID.
4. Click on New CSS rule.
5. Define the rule in your external CSS file- mystyle1.css.
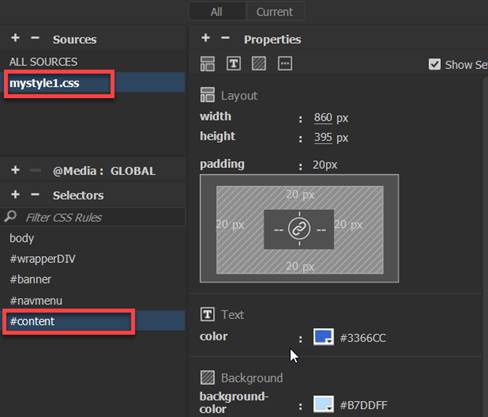
6. Enter the following rules in the CSS Definition dialog box:
color: #3366CC
background-color: #B7DDFF
width: 860px
height: 395px
padding: 20px (all sides)
Note: If you click on Show Set
check box, only the rules you selected will display in the Properties window
H. Create the footer DIV
tag layer.
1. Insert a DIV tag. From the
Insert Panel, select DIV
2. For the Insert, select “After
tag” “<div id=”content”>
3. Enter “footer” as
the ID.
4. Click on New CSS rule.
5. Define the rule in your external CSS file- mystyle1.css.
6. Enter the following rules in the CSS Definition dialog box:
color: #FFF
font-size: 12px
background-color: #3366CC
text-align:
center;
width: 900px
height: 30px
padding-top: 5px;
padding-bottom: 5px;
Note: If you click on Show
Set check box, only the rules you selected will display in the Properties
window 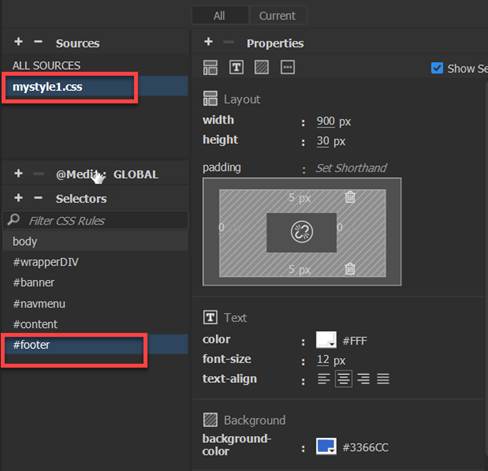
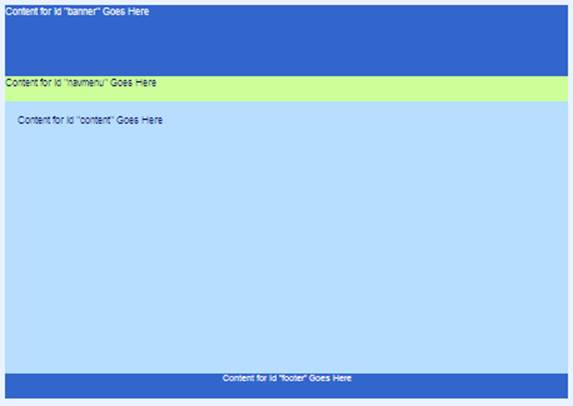
I. Save and Test the layout1.html page:
1. Select File from the menu and then Save All.
2. Test
your html document. .
From the File Panel, right click on the layout2.html page and select
Open in Browser
![]()
3. Verify your document is complete and that it closely
matches the page layout below.
PART
2: Two Column Page Layout using Jello Design (Centered Page) Technique
A. Create an external CSS
file.
1. Create an external Cascading Style Sheet (CSS) file.
2. Name the file as “mystyle2.css”.
3. Save the file in the CSS folder.
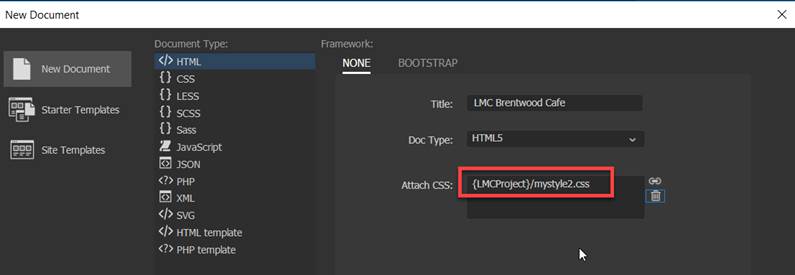
B. Create a new HTML
document.
1. Create a new HTML document. From the Insert Panel, select DIV
2. Add the title “LMC Brentwood Cafe” to the html page.
3. Attach the mystyle2.css style sheet to
the layout1.html page
NOTE: Verify mystyle2.css is the only style sheet
is attached.
4. Name and save the file
as “layout2.html” page in the root
of your Lesson8 folder.
C. Configure the page font and background color.
1. Create a new CSS rule.
2. For the Selector Type,
choose Tag
3. For the Selector Name,
enter the body
4. Define the rule in the
external CSS file- mystyle2.css
5. Select and verify the
following rules in the category
font-family:
Lucida Grande
font-size: 16px
color: #3366CC
background-color: #E8F3FF
Note: If you click on Show
Set check box, only the rules you selected will display in the Properties
window
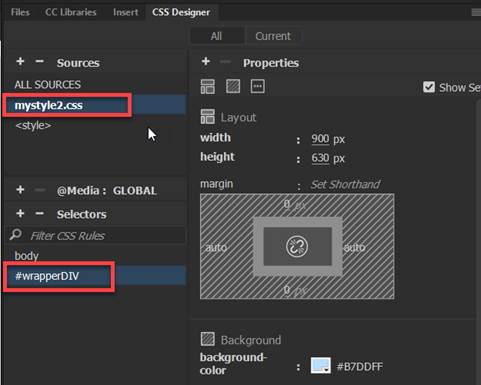
D. Create the wrapper DIV
tag layer which will be use to center the page.
1. Insert a DIV tag.
2. Enter “wrapper” as
the ID.
3. Click on New CSS rule.
4. Define the rule in your external CSS file- mystyle2.css
5. Enter the following rules in the CSS Definition dialog box:
background-color: #B7DDFF
width: 900px
height: 630px
margin-right:
auto
margin-left: auto
Note: If you click on Show
Set check box, only the rules you selected will display in the Properties
window
6. Delete the
text placeholder in the DIV container you created before proceeding.
NOTE: Before proceeding, you
will need to delete any text placeholder in the wrapper DIV layer (see step
D6).
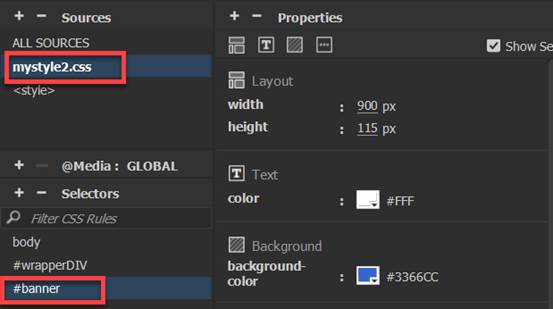
E. Create the banner DIV
tag layer.
1. Verify there is no text in the #wrapper layer and the cursor is
blinking inside the container.
2. Insert a DIV tag. From
the Insert Panel, select DIV
3. Enter “banner” as
the ID.
4. Click on New CSS rule.

5. Define the rule in your external CSS file- mystyle2.css
6. Enter the following rules in the CSS Definition dialog box:
color: #FFF
background-color: #3366CC
width: 900px
height: 115px
Note: If you click on Show
Set check box, only the rules you selected will display in the Properties
window
F. Create the navmenu DIV tag layer.
1. Insert a DIV tag.
2. For the Insert, select “After tag” “<div id=”banner”>
3. Enter “navmenu”
as the ID.
4. Click on New CSS rule.
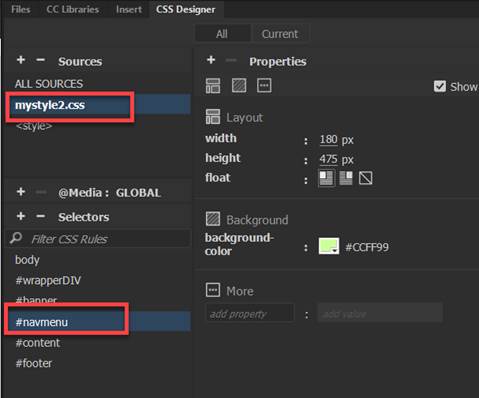
5. Define the rule in your external CSS file- mystyle2.css
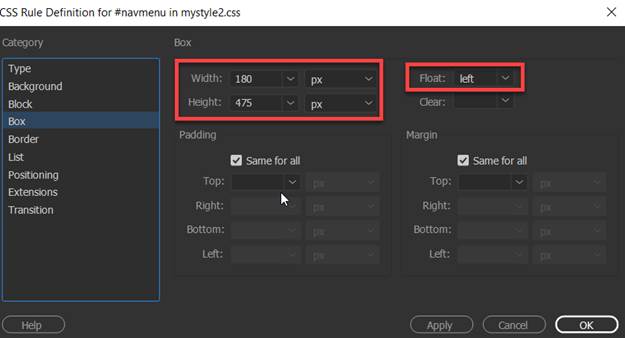
6. Enter the following rules in the CSS Definition dialog box:
background-color:
#CCFF99
width: 180px
height: 475px
float: left (Note: this rule
can be found in the Box category)
Note: If you click on Show
Set check box, only the rules you selected will display in the Properties
window
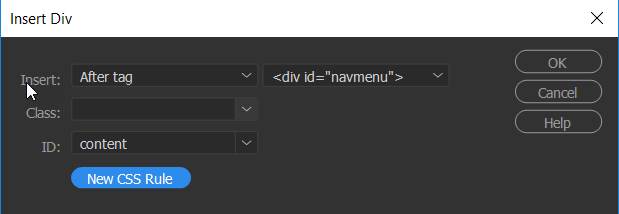
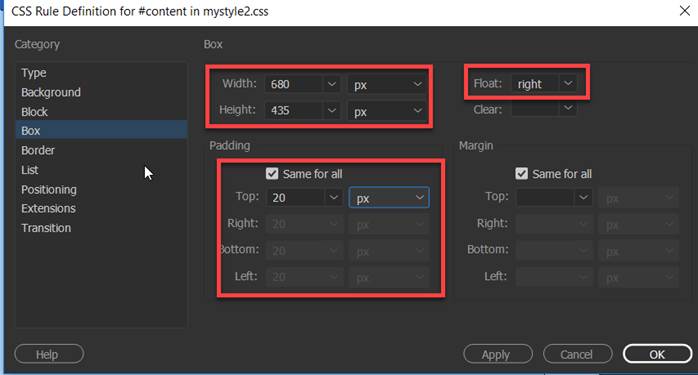
G. Create the content DIV
tag layer.
1. Insert a DIV tag.
2. For the Insert, select “After
tag” “<div id=”navmenu”>
3. Enter “content” as
the ID.
4. Click on New CSS rule.
5. Define the rule in your external CSS file- mystyle2.css
6. Enter the following rules in the CSS Definition dialog box:
background-color:
#B7DDFF
width: 680px
height: 435px
float: right (Note: This rule can be
found in the Box category)
padding: 20px (all sides)
Note: If you click on Show Set
check box, only the rules you selected will display in the Properties window

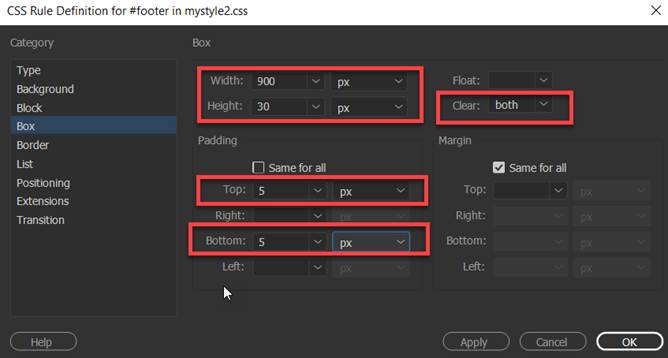
H. Create the footer DIV
tag layer.
1. Insert a DIV tag.
2. For the Insert, select “After
tag” “<div id=”content”>
3. Enter “footer” as
the ID.
4. Click on New CSS rule.

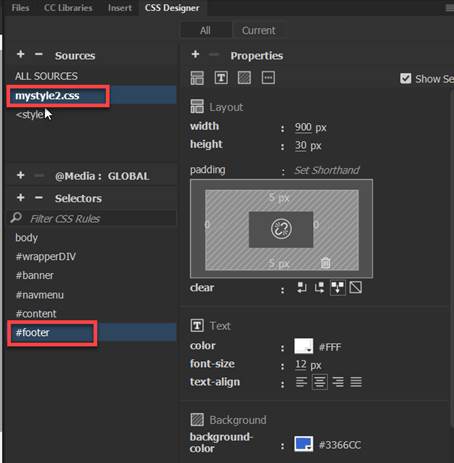
5. Define the rule in your external CSS file- mystyle2.css
6. Enter the following rules in the CSS Definition dialog box:
font-size: 12px
color: #FFF
background-color: #3366CC
text-align: center
width: 900px
height: 30px
clear: both (Note: This rule can be
found in the Box category)
padding-top: 5px;
padding-bottom:
5px;
Note: If you click on Show
Set check box, only the rules you selected will display in the Properties
window
I. Save and Test the layout2.html page:
1. Select File from the menu and
then Save All.
2. Test your html document . From the
File Panel, right click on the layout2.html page and select Open in Browser
![]()
3. Verify your document is complete and that it closely
matches the page layout below.
Submit:
1. Zip up and compress your Lesson 6 folder.
2. Upload the compressed folder into the Canvas Assignment page for Dreamweaver
Lab Lesson 6.
|
Lesson 6 Topics |
Points |
|
1. Creating and attaching an external CSS |
5 |
|
2. Insert a DIV tag layer containers |
10
|
|
3. Configure the formatting and layout rules |
10 |
|
4. Setup the page font and background color |
5 |
|
Total |
30 |