Adobe Animate and Dreamweaver
Lab Lesson 2:
In
this lesson, you will be creating the “skeleton”
page layout using AP (Absolute Position)
layers for the index.html page of the LMC Animal Hospital site.
1.
Setup a manage site.
2.
Create a new HTML document.
3. Create an external cascading style sheet (CSS) and attaching the file to the
HTML document.
4. Insert a DIV tag layer wrapper container to center the page.
5.
Insert the AP (Absolute Position) layer for the parent container.
6. Insert the AP layers for the child containers.
7. Configure the background color, box dimensions (width & height) and
positions (top & left) for the AP containers.
8.
Setup the page font, background image and top margin.
9. Insert image and text placeholders.
10. Move the AP layout style rules to the external CSS file.
11.
Add the table for the navigation menu and the hyperlinks.
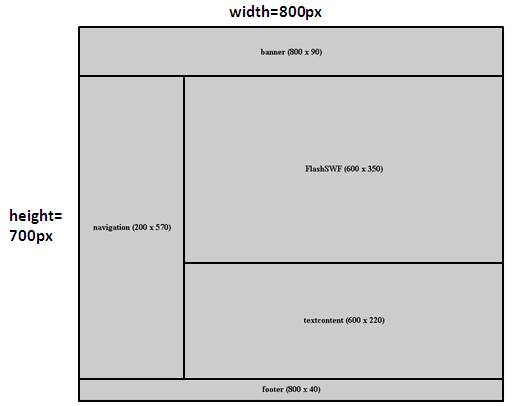
Below is the wireframe
of the index.html:
Below are
the hexadecimals values for the layer colors:
1. AP Parent Layer: #A6C2FF
![]()
2. Banner Layer: #000033
![]()
3. Navigation Layer: #D5E3FF
![]()
4. Footer Layer: #000033
![]()
Prerequisites:
1. Create
a folder on your desktop called Lesson2.
2. Download the images folder and copy the folder into
the root your Lesson2 folder.
3.
See the attached sample of the output
web page- Lesson 2 output page.
Requirements for Adobe Animate:
A. Create the Company banner jpeg image

1. Launch Animate and open
the file called companylog.fla from the images
folder
2. From the main menu, select
File-> Publish Settings.
3. Click only the JPEG
image checkbox under the Other Formats
4. Click on the Publish
button.

B. Create the Animate
Canvas file

1. Launch Animate and open
the file called FlashProject2.fla from the images folder
2. From the main menu,
select File-> Publish Settings.
3. Click OAM Package
check box. Make the JavaScript/ HTML
checkbox is selected.
4. Click on the Publish
button.

Requirements for Dreamweaver:
A. Setup the manage site
1. From the main menu, select
Site-> New Site
2. Enter the Site Name as
“LMC Animal Hospital”
3. Select the Local Site Folder to your
Lesson2 folder on your desktop.
4. Click Save

5. In the Files Properties panel, you
should see the folder and files.

B. Create an external CSS
file
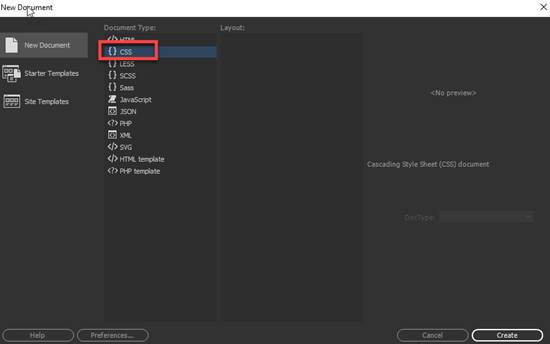
1. From the main menu, select File->New Document
2. Select CSS as the Document Type
3. Click on Create
4. From the main menu, select File-> Save As. Save the CSS document as “mystyle.css” page in the root of your
Lesson2 folder.
C. Create a new HTML
document
1. From the main menu, select File->New Document
2. Select HTML5 as the document type
3. For the Tittle, enter
“LMC Animal Hospital”
4. Attached the CSS file
you created above. Click on the link and
locate mystyle.css in your Lesson2 root folder
5. Click on Create

4. From the main menu,
select File->Save As. Save the HTML
document as “index.html” page in the
root of your Lesson2 folder.
D. Create the wrapper DIV
tag layer which will be use to center the page.
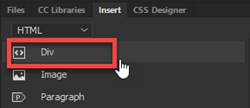
1. Insert a DIV tag. From
the Insert Panel, select DIVE
2. For the Insert, select
“At insertion point”
3. Enter “wrapperDIV” as the ID.
4. Click on New CSS rule.

4. Define the rule in your external CSS file- mystyle.CSS (circled
in red)

5. Enter the following rules in the Box category: Once the rules are entered, click OK
width: 800px
height: 700px
margin-right:
auto
margin-left: auto

6. Delete the
text placeholder in the DIV container you created before proceeding.
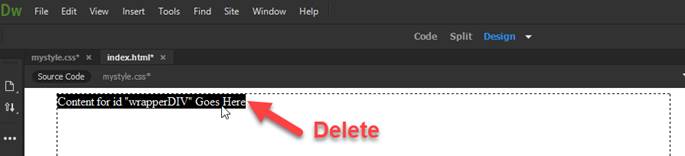
NOTE: Before you proceed, you
will need to delete the text placeholder in the DIV layer (see step D6).
E. Create the AP (Absolute
Position) parent container
1. Verify the cursor is
blinking inside the wrapperDIV layer you create above
2. Insert a DIV tag. From the Insert Panel, select DIV.
3. For the Insert, select
“At insertion point”
4. Enter “parentAP” as the ID.
5. Click on New CSS rule.

6. Define the rule in your
external CSS file- mystyle.CSS (circled in red)

7. Enter and verify the following rules in the Positioning category
position:absolute
width:800px
height:700px

8. Enter the following rule in the Background category
background-color: #A6C2FF

9. Delete the
text placeholder in the DIV container you created before proceeding.
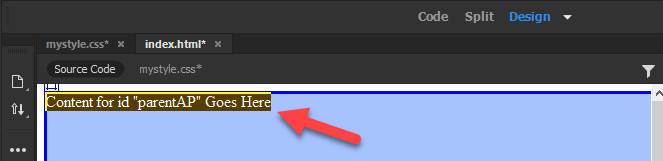
NOTE: Before you proceed, you
will need to delete the text placeholder in the DIV layer above (see red arrow)
F. Create the AP (Absolute
Position) child container for the company banner image
1. Click inside the parentAP layer.
Note:
The guide at the bottom should show this
![]()
2. Insert a DIV tag. From the Insert Panel, select DIV.
3. For the Insert, select “After start
of tag” <div
id= “parentAP”>
4. Enter “banner”as the ID.
5. Click on New CSS rule.

6. Define the rule in your
external CSS file- mystyle.CSS (circled in red)
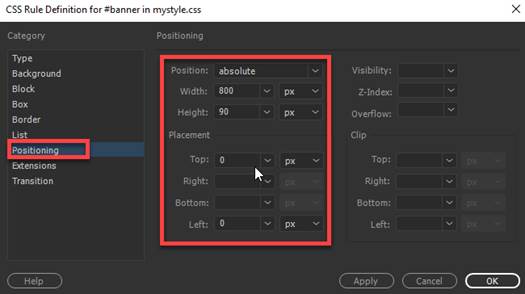
7. Enter and verify the
following rules in the Positioning category:
position:absolute;
width:800px
height:90px
left: 0px
top: 0px
8. Enter the following rule in the Background category
background-color: #000033

9. Enter the following rule in the Type category
color: #FFF

10. Delete
the text placeholder in the DIV container you created before proceeding.

NOTE: Before you proceed, you
will need to delete the text placeholder in the DIV layer above (see red arrow)
G. Create the AP (Absolute Position)
child container for the navigation menu
1. Click inside the parentAP DIV layer.
Note:
The guide at the bottom should show this.
![]()
2. Insert a DIV tag. From the Insert Panel, select DIV.

3. For the Insert, select “After start
of tag” <div
id= “parentAP”>
4. Enter “navigation” as the
ID.
5. Click on New CSS rule.

6. Define the rule in your
external CSS file- mystyle.CSS (circled in red)
7. Enter and verify the following rules in the Positioning
category:
position:absolute;
width:200px
height:570px
left: 0px
top: 90px

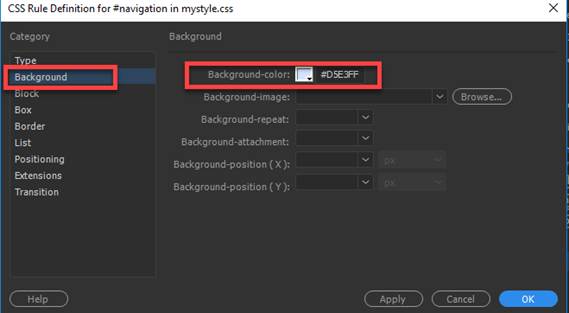
8. Enter the following rule in the Background category
background-color: #D5E3FF

9. Delete the
text placeholder in the DIV container you created before proceeding.

NOTE: Before you proceed, you
will need to delete the text placeholder in the DIV layer above (see red arrow)
H. Create the AP (Absolute
Position) child container for the Animate Flash file section.
1. Click inside the parentAP DIV layer.
Make sure you are NOT in the navigation layer
Note:
The guide at the bottom should show this
![]()
2. Insert a DIV tag. From the Insert Panel, select DIV.

3. For the Insert, select “After start
of tag” <div
id= “parentAP”>
4. Enter “animatecontent”as the ID.
5. Click on New CSS rule.

6.. Enter and verify the following rules in the Positioning
category:
position:absolute
width:600px
height:350px
left: 200px
top: 90px

9. Delete the
text placeholder in the DIV container you created before proceeding.

NOTE: Before you proceed, you
will need to delete the text placeholder in the DIV layer above (see red arrow)
I. Create the AP (Absolute Position) child
container for the text content section.
1. Click inside the parentAP DIV layer.
Make sure you are NOT in the navigation layer
Note:
The guide at the bottom should show this
![]()
2. Insert a DIV tag. From the Insert Panel, select DIV.
3. For the Insert, select “After start
of tag” <div
id= “parentAP”>
4. Enter “textcontent”as the ID.
5. Click on New CSS rule.

6. Define the rule in your
external CSS file- mystyle.CSS (circled in red)
7. Enter and verify the following rules in the Positioning category:
position:absolute
width:600px
height:220px
left: 200px
top: 440px

8. Enter the following rule in the Background category
background-color: #D5E3FF
9. Delete the
text placeholder in the DIV container you created before proceeding.
NOTE: Before you proceed, you
will need to delete the text placeholder in the DIV layer above (see red arrow)
J. Create the AP (Absolute
Position) child container for the footer section.
1. Click inside the parentAP DIV layer.
Make sure you are NOT in the navigation layer
Note:
The guide at the bottom should show this
![]()
2. Insert a DIV tag. From the Insert Panel, select DIV.
3. For the Insert, select “After start
of tag” <div
id= “parentAP”>
4. Enter “footer”as the ID.
5. Click on New CSS rule.

6. Define the rule in your
external CSS file- mystyle.CSS (circled in red)
7. Enter and verify the following rules in the Positioning
category:
position:absolute
width:800px
height:40px
left: 0px
top: 660px

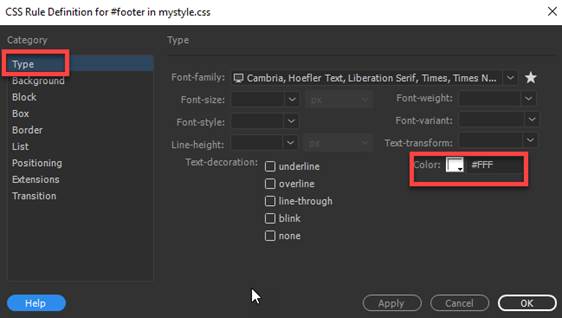
8. Enter the following rule in the Type category
color: #FFF
9. Enter the following rule in the Background category
background-color: #003

10. Delete
the text placeholder in the DIV container you created before proceeding.
NOTE: Before you proceed, you
will need to delete the text placeholder in the DIV layer above (see red arrow)
K. Create body tag rule - configure
the page font, background image and top margin.
1. Create a new CSS rule. Go to the CCS Designer
Panel.
Note:
If panel is not open, from the File Menu, select Window-> CCS
Designer
2. Select mystyle.css as the Source
3. Click on the + icon in the Selectors section.
4. Type body for CCS tag rule

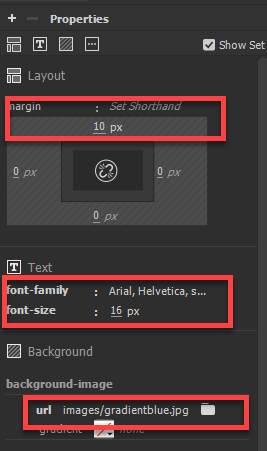
5. From the Properties Panel, select and verify
the following rules in the category
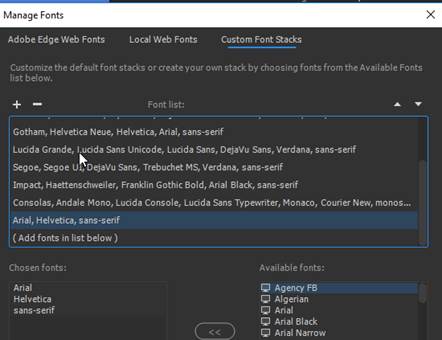
font-family: Arial, Helvetica,
sans-serif
NOTE: You will need to add these fonts selection
under Manage Fonts-> Custom Font Stacks
font-size: 16px
background-image: url(images/gradientblue.jpg)
margin-top: 10px
L. Insert the companylogo.jpg image file in the banner AP Layer.
1. Click inside the banner layer
2. Go to the Insert Panel and select Image
3. Insert the logo.jpg from your images folder

M. Insert the Animate Canvas File
1. Click inside the animatecontent
DIV layer
2. Go to the Insert Panel and select Animated Composition.
3. Select the FlashProject2.oam in your images folder.
4. Click on the Animate file and change
the size to W= 600 and H= 350

N. Insert the table for the navigation menu and
add the hyperlinks.
1. Click inside the navigation layer.
2. Go to the Insert Panel and select Table
3. In insert a table with 7 rows and 1 columns
Set table width to 100%, border
thickness to 0 px, cell padding and cell spacing to 0 with Header= None

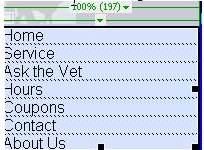
4. Insert the
following text for navigation menu in the table cells.
5. Add
a new compound CSS rule for the navigation layer anchor tag (hyperlink):
a. Create a new CSS rule.
Go to the CCS Designer Panel. If panel
is not open, from the File Menu, select Window-> CCS Designer
b. Select mystyle.css as
the Source
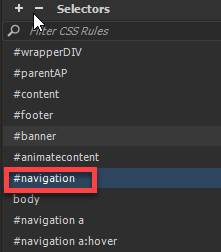
c. Click on the + icon in
the Selectors section.
d. Type #navigation a for CCS tag rule

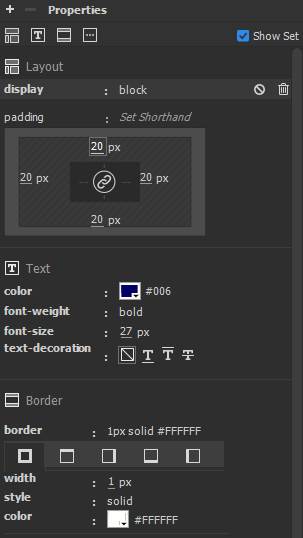
e. Add the following style rules for the #navigation a in the Properties Panel
font-size: 27px
font-weight: bold
color: #006
text-decoration: none
display: block
padding: 20px
border-bottom-width: 1px
border-bottom-style: solid
border-bottom-color: #FFF
6. Add a new
compound CSS rule for the navigation layer anchor tag hover (hyperlink)
a. Create a new CSS rule.
Go to the CCS Designer Panel. If panel
is not open, from the File Menu, select Window-> CCS Designer
b. Select mystyle.css as
the Source
c. Click on the + icon in
the Selectors section.
d. Type #navigation a:hover for CCS tag
rule

e. Add the following style rules for the #navigation a
hover in the Properties Panel
color: #FFF
background-color: #003

7. Add the hyperlinks for the text in navigation menu
table
a. Home - index.html
b. Service- service.html
c. Ask the Vet- askthevet.html
d. Hours - hours.html
e. Coupons- coupons.html
f. Contact- contact.html
g. About Us- aboutus.html
8. Modify the
#navigation ID rule to add borders
a. Reset the height of the ID
#navigation layer rule to 570 px
Set the width of
the ID #navigation layer rule to 198 px\
b. Add the top, right, and left border
border-top-width: 1px
border-top-style: solid
border-top-color: #FFF
border-right-width: 1px
border-right-style: solid
border-right-color: #FFF
border-left-width: 1px
border-left-style: solid
border-left-color: #FFF

Test:
1. Save your changes
in index.html and mystyle.css. From the
main menu, select File-> Save ll
2. Preview your
web page by right clicking on index.html from the File Panel and select Open in
Browser.

3. Verify
your document is complete and that it closely matches the attached Lesson 2 output page.
Submit:
1. Zip up and compress your Lesson2 folder.
2. Upload the compressed folder into the Canvas Dreamweaver Lab Lesson 2 Drop
box.
|
Lesson 2 Topics |
Points |
|
1. Creating and attaching an external CSS |
5 |
|
2. Inserting a DIV tag layer |
5 |
|
3. Inserting AP parent and child layers |
5 |
|
4. Configuring the DIV and AP layer CSS rules |
5 |
|
5. Setup the page font, background image |
2 |
|
6. Inserting image, text placeholder and table |
8 |
|
Total |
30 |
<img src="images/FlashProject2.jpg" width="600" height="350" />