Dreamweaver
Lab Lesson 10 Part 1
You will
be creating the page layout, index pages and inserting the Animate canvas file for
the LMC Bakery Shop web site.
1.
Optimized the photo images
using Adobe Photoshop.
2. Creating the logo images using Adobe Flash and Adobe Photoshop.
3.
Creating the gradient background image and slideshow SWF for the home page.
4.
Creating the page layout and home page.
5.
Inserting the images using jQuery library scripts for the image slideshow.
Below is the wireframe:

Prerequisites:
1.
Download the Lesson10.zip file and extract the site folder .
2. In
Dreamweaver, create Manage Site
Requirements:
A. Create an external CSS style sheet called mystyle.css
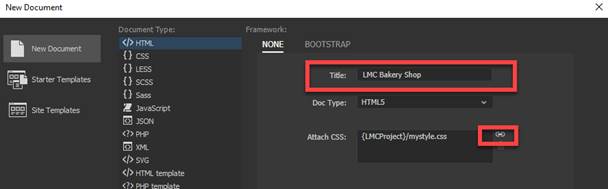
B. Create an HTML page and save as layout.html
a.
Add the title “LMC Bakery Shop” to the page
b.
Add the style sheet mystyle.css to the layout.html page.
C. Create the body tag rule:
1.
Define the rule in the external CSS file- mystyle1.css. Select
mystyle.css from the Sources.
2. Click the + sign to add the Selector
Name, enter body.
3. Select and verify the following rules in the
category:
font-family: Lucida Granda
background-image: url(images/gradient.jpg) (Note: Click on browse and insert
the image)
background-repeat: repeat-x
margin-top: 5px
margin-right: 0px
margin-bottom: 0px
margin-left: 0px

D. Insert the #wrapper DIV tag layer
1.. Verify the cursor
is blinking at the top of the page
2. Insert a DIV tag at
Insertion Point
3. Enter “wrapper” as the ID.
4. Click on New CSS rule.
5. Define the rule in your external CSS file- mystyle.css

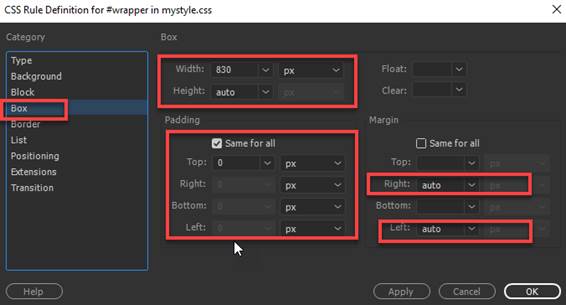
6. Enter the following rules in the
CSS Definition dialog box:
width: 830px
height: auto
margin-top: 8px
margin-right: auto
margin-bottom: 0
margin-left: auto
padding: 0px (all sides)
position: relative (Note: This property is in
the positioning category)

NOTE: Before proceeding, you will need to delete
any text placeholder in the wrapper DIV layer

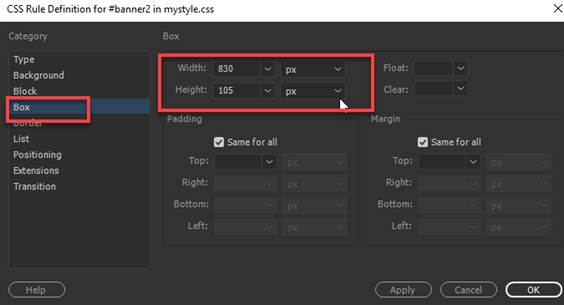
E. Insert the #banner DIV tag layer
1. Verify there is no text in the
#wrapper layer and the cursor is blinking inside the container.
NOTE: In the Code window, your cursor should be inside
the wrapper DIV tag

2. Insert a DIV tag at Insertion Point
3. Enter “banner” as the ID.
4. Click on New CSS rule.
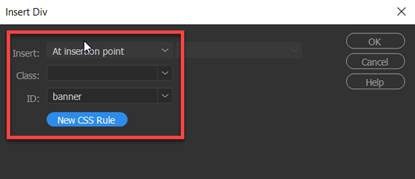
5. Enter the following rules in the
CSS Definition dialog box:
width: 830px
height: 105px
NOTE: Before proceeding, you will need to delete
any text placeholder in the banner DIV layer

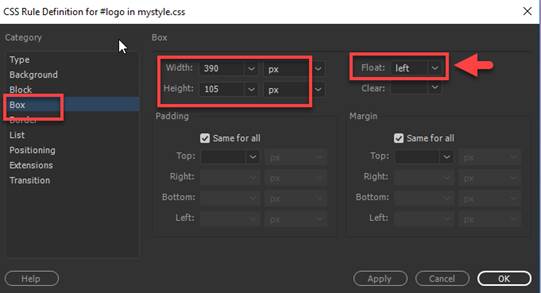
F. Insert the #logo DIV tag layer
1. Verify there is no
text in the #banner layer and the cursor is blinking inside the container.
2. Insert a DIV tag at Insertion Point
3. Enter “logo” as the ID.
4. Click on New CSS rule.
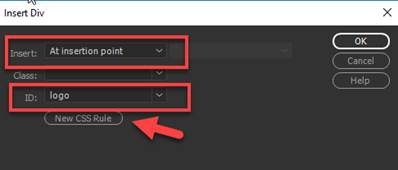
5. Enter the
following rules in the CSS Definition dialog box:
width: 390px
height: 105px
float: left
NOTE:
Before proceeding, you will need to delete any text placeholder in the logo
DIV layer

G. Insert
the #navmenu DIV tag layer
1. Insert a
DIV tag.
2. For
the Insert, select “After tag” <div
id=”logo”>.
3. Enter “navmenu” as the ID.
4. Click on New CSS rule.
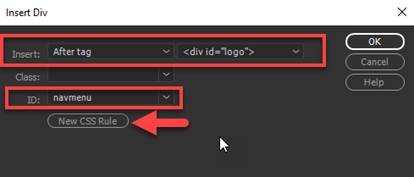
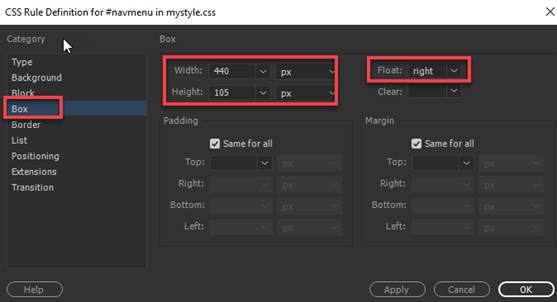
5. Enter the
following rules in the CSS Definition dialog box:
width: 440px
height: 105px
float: right
NOTE:
Before proceeding, you will need to delete any text placeholder in the navmenu layer

H. Insert
the #content DIV tag layer
1. Insert a DIV tag.
2. For
the Insert, select “After tag”
<div id=”banner”>.
3. Enter “content”
as the ID.
4. Click on New CSS rule.
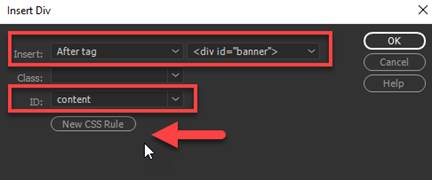
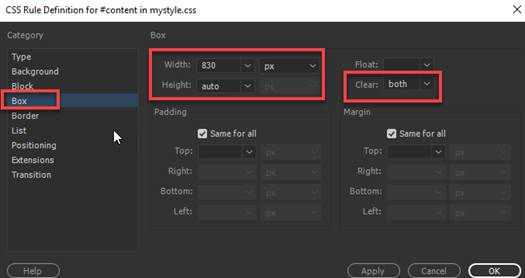
5. Enter the following rules in the
CSS Definition dialog box:
background-color: #FFF
width: 830px
height: auto
clear: both
min-height: 534px
 \
\
NOTE: Before proceeding, you will need to delete
any text placeholder in the content layer

I. Insert the #footer DIV tag layer
1. Insert a
DIV tag.
2. For
the Insert, select “After tag”
<div id=”content”>.
3. Enter “footer” as the ID.
4. Click on New CSS rule.

5. Enter the
following rules in the CSS Definition dialog box:
font-size: 12px
text-align:
center
width: 830px
height: 30px
padding-top: 5px
padding-bottom: 5px

NOTE: Before proceeding, you will need to delete
any text placeholder in the footer layer
![]()
J. Insert the logo-image in the logo DIV layer
1. Click inside the Logo layer.
2.
Insert the image- company-log.png

K. Create the navigation menu
NOTE:
Delete the text place holder in the navmenu layer before
proceeding
1. In the #navmenu layer, create the compound rules for the navigation
menu.
a. Create the compound rule #navmenu a for the link
color: #FFF
font-weight: bold
font-size: 16px
text-decoration: none

b.
Create the compound rule #navmenu a:hover for the
rollover link
color: #333

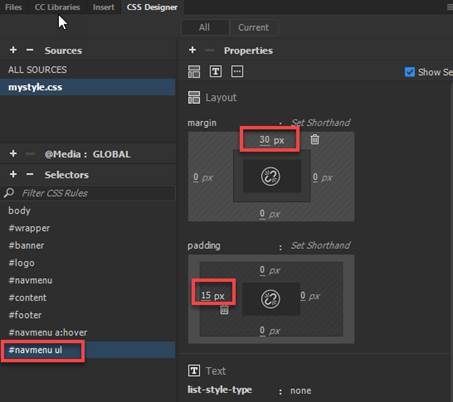
c. Create the compound rule #navmenu ul for the unordered list
margin-top:
30px
list-style-type: none
padding-left: 15px
d.
Create the compound rule #navmenu li for the list
item
display: inline
width: 95px
padding-right: 5px
float: left

2. In the #navmenu
layer, create the navigation menu using UL and LI tags
a.
Click inside the navmenu layer. In the Code window, the cursor should be blinking
inside the navmenu layer

b.
From the Insert Panel, insert the unordered list (UL) tag in the #navmenu layer.
![]()
c. Insert the list items (LI) as follows
by typing the text and pressing <enter> after each menu item.
Cakes & Cupcakes
Muffins & Pastries
Bread & Bagels
Cookies & Confections
NOTE: Press enter after entering each list item

NOTE: In the code window, the UL
and LI tags should appear as follows:

d. For the menu items, insert the link place
holder # for each of list items
Highlight each text. In the Properties window, in the navigation
menu and add the # in the Link field as the link placeholder
NOTE: To open the Properties window, press Ctrl F3 or
from the menu, select Windows-> Properties.

L. Add the content for the #footer layer.
1. Click inside the footer layer, in the Code
window, verify the cursor is in the footer DIV tag

2. Copy and paste the following text in the footer layer.
Copyright © 2013 LMC Bakery Shop | Photo Gallery | Location | Hours |Contact |
About Us| FAQ
101 A
Sand Creek Road, Brentwood CA 94513 (925) 513-1625
NOTE: When copying, use the
Paste Special- Text Only
3. Insert
link place holder # for each of list items - Photo Gallery | Location | Hours
|Contact | About Us| FAQ
In the Properties window, highlight each text
in the navigation menu and add the # in the Link field as the link placeholder
NOTE: To open the Properties window, press Ctrl F3 or
from the menu, select Windows-> Properties.

4. Create
#footer a compound rule
color: #000
text-decoration: none
display: inline-block
padding-right: 5px
padding-left: 5px

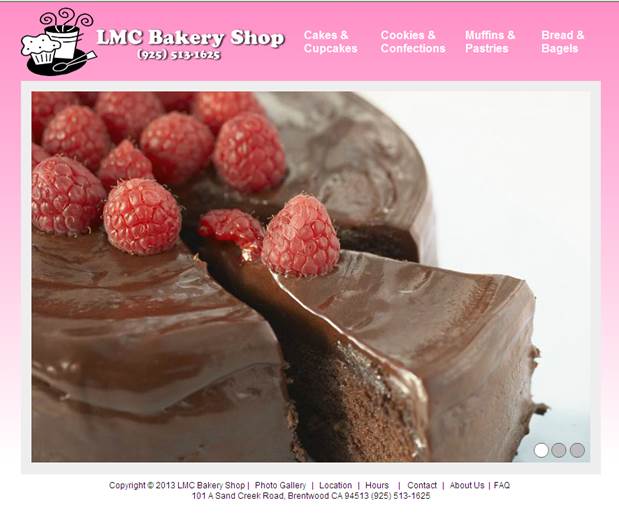
M. Save all and test page. Below is the page layout output.

N. Create index.html page
1. Using the layout.html page, create and save
the index.html
2. In the content layer, deleted the text
placeholder
3. Verify that you are in the Content
layer. In the Code Window, verify the
cursor is blinking inside the content DIV tag

4. In the Insert Panel, select Animated
Composition
![]()
5. Select the sideshow-home.oam
file in the images folder/

4. Save all and test page. Below is the index page

O.
Save and Test the index.html
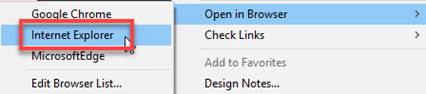
1. Go to the File Panel
2. Right click on the index.html and select Open Browser-> Internet Explorer
Submit:
1. Zip up and compress your LMC Bakery Shop site folder.
2. Upload the compressed folder into the Canvas Lesson 10 Drop Box.